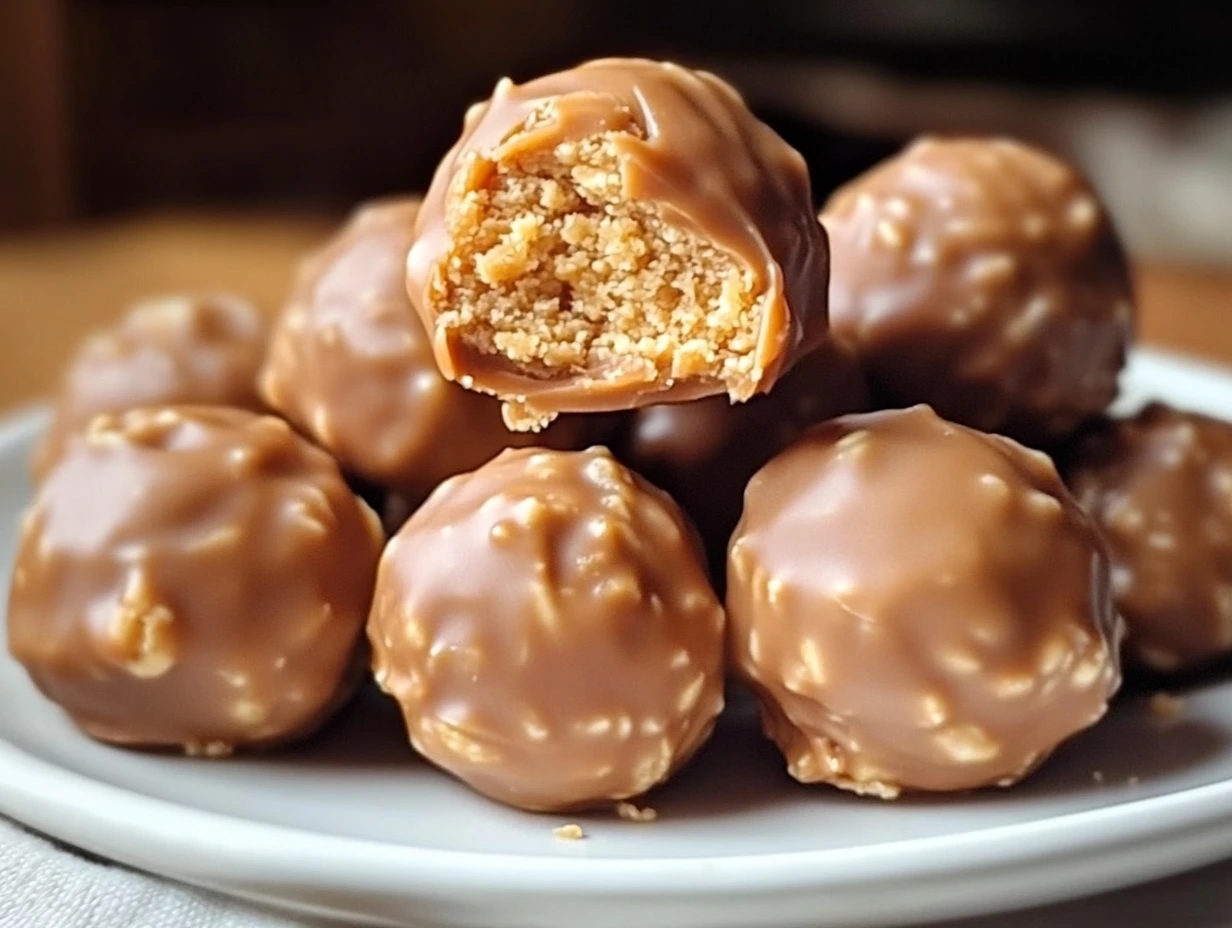
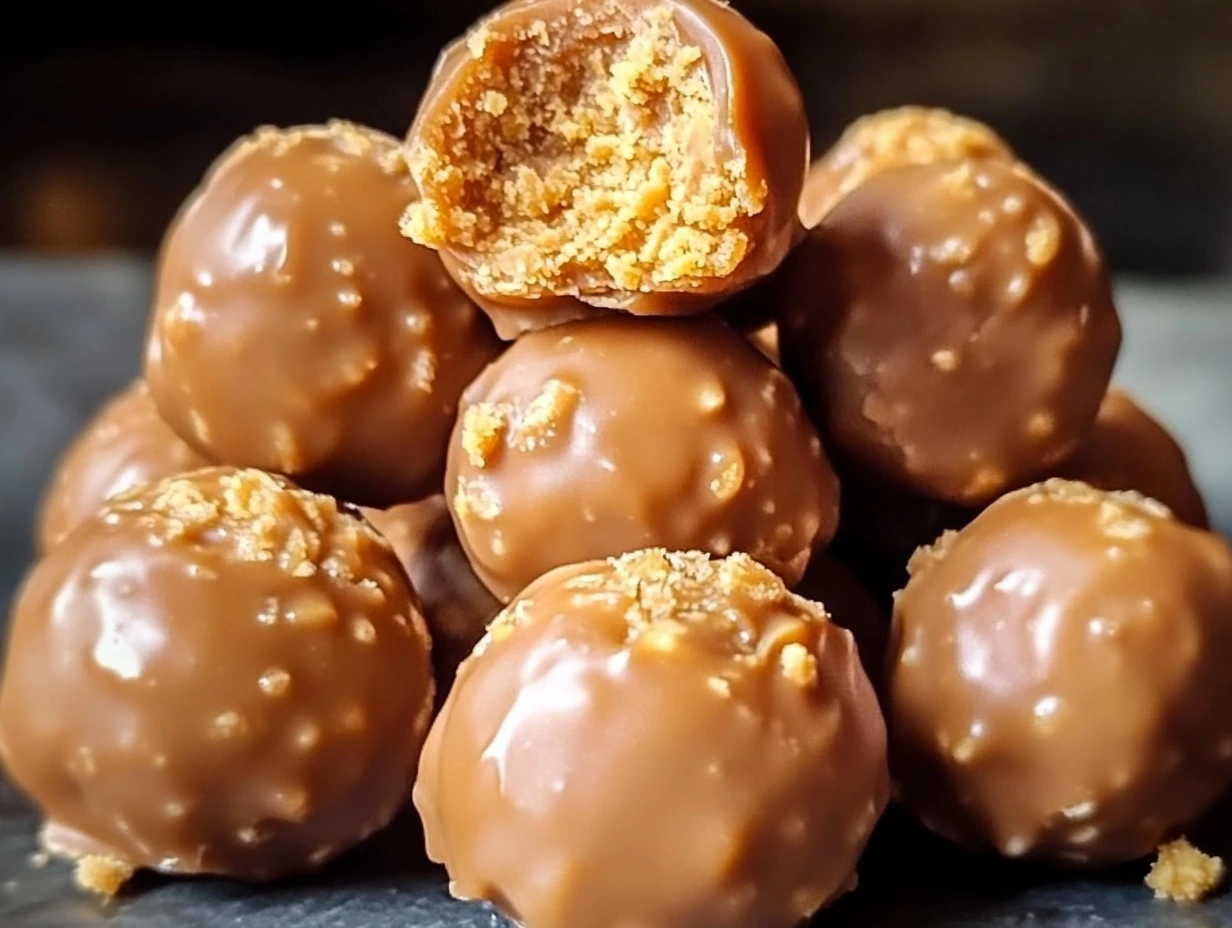
Butterfinger Balls are the perfect no-bake treat, combining a nostalgic, crunchy candy with a creamy, melt-in-your-mouth texture. This easy recipe is ideal for anyone craving a sweet and satisfying dessert without needing an oven or advanced baking skills. Each ball is packed with the unmistakable, peanut-buttery crunch of Butterfinger candy, balanced with the smoothness of cream cheese and a rich chocolate coating. These treats are a hit at parties, make for great gifts, and are quick enough to whip up for a simple indulgence at home. Plus, they’re customizable and can be adapted to suit your taste, whether you prefer a different chocolate coating or unique toppings. With just a few basic steps, Butterfinger Balls are an approachable yet delicious dessert that anyone can enjoy.
This recipe keeps it simple with a few key ingredients that work together perfectly. Crushed Butterfinger candy bars provide a crunchy, peanut-buttery filling, while softened cream cheese helps create a smooth, rich texture that holds everything together. Semi-sweet chocolate chips form a classic chocolate coating that’s not overly sweet, allowing the Butterfinger flavor to shine through. A touch of vegetable shortening (optional) can be added to the chocolate for a glossy, professional finish. Optional toppings, like additional Butterfinger pieces or chocolate sprinkles, add extra texture and decoration. Feel free to experiment with milk or dark chocolate for a different flavor profile.
Step-by-Step Instructions
Step 1: Prepare the Mixture
To start, gather softened cream cheese and crushed Butterfinger candy bars. Ensure the cream cheese is at room temperature for easy mixing, which prevents clumps and allows for a smooth, uniform consistency. In a large mixing bowl, add the crushed Butterfinger pieces and softened cream cheese. Mix thoroughly using a spoon, spatula, or hand mixer until the candy pieces are evenly distributed and the mixture reaches a smooth, cohesive texture. If you prefer a bit more crunch, set aside a small portion of the crushed Butterfinger to add in once the mixture is almost combined. The ratio of two cups of Butterfinger to eight ounces of cream cheese is balanced to achieve both creamy texture and prominent Butterfinger flavor, but feel free to adjust slightly based on taste preference. Proper mixing is key here for a delicious result.
Step 2: Forming the Balls
Once the mixture is well-combined, it’s time to shape it into balls. Using a small cookie scoop or a spoon, scoop out portions and roll each one between your palms to create 1-inch balls. This size is ideal for bite-sized treats, ensuring each ball has the right balance of filling and chocolate coating. If the mixture feels sticky, you may want to refrigerate it briefly for easier handling. Place each rolled ball onto a baking sheet lined with parchment or wax paper; this lining prevents the balls from sticking and makes for easy cleanup. For uniformity, a cookie scoop helps keep the size consistent, but hand-rolling can also give you control over each ball’s shape and texture. Aim for round, compact shapes so that they’ll dip well in chocolate and set evenly.
Step 3: Chill the Balls
Once all the balls are formed, refrigerate them for about 30 minutes. Chilling is essential as it firms up the cream cheese and Butterfinger mixture, making the balls less sticky and easier to dip in chocolate without falling apart. If you’re in a hurry, you can speed up this step by placing the tray in the freezer for around 15 minutes instead. However, be cautious not to freeze them for too long, as overly cold balls can cause the chocolate to harden unevenly or crack when dipping. This step ensures that the balls stay intact during coating, resulting in a smoother, more polished finish.
Step 4: Melt the Chocolate
While the balls chill, begin melting the chocolate chips. Place the semi-sweet chocolate chips in a microwave-safe bowl, heating them in 30-second intervals. Stir between each interval to prevent overheating, which can cause chocolate to seize up. If desired, add a tablespoon of vegetable shortening to the chocolate for a smoother, glossier finish, making it easier to coat the balls evenly. Continue heating and stirring until the chocolate is completely melted and smooth. If you prefer, you can also melt the chocolate over a double boiler on the stovetop, which offers more control and reduces the risk of burning. Avoid introducing any moisture to the chocolate, as water can cause it to seize. Common mistakes to avoid include overheating, which makes chocolate thick and difficult to work with, and using chocolate that isn’t finely chopped or evenly heated, as this can lead to lumps.
Step 5: Dip the Balls
Now for the fun part – coating the balls in chocolate! Remove the chilled Butterfinger balls from the refrigerator. Using a fork or toothpick, carefully lower each ball into the melted chocolate, ensuring it’s fully coated. Lift the ball out, allowing any excess chocolate to drip off by gently tapping the fork or toothpick on the side of the bowl. This helps avoid thick patches of chocolate and ensures a smooth, even coating. Place each coated ball back onto the lined baking sheet. If the chocolate begins to thicken as you work, reheat it in short intervals to maintain a smooth consistency. If you notice the chocolate isn’t adhering well or if air bubbles appear, let the balls sit for a few seconds before dipping again. For troubleshooting, if the chocolate coating appears streaky, the chocolate may be cooling too quickly – try dipping a few balls at a time, reheating as needed.
Step 6: Decorate and Set
While the chocolate coating is still wet, sprinkle the tops of each Butterfinger ball with additional crushed Butterfinger pieces, chocolate sprinkles, or any decoration you like. If using sprinkles or candy, add them immediately after dipping, as chocolate hardens quickly, especially if the balls were chilled before dipping. You can get creative here by adding edible glitter, nuts, or even colored sugars for a festive touch. Aim for light, even coverage so the decorations stick well without overwhelming the look or flavor.
Step 7: Set and Serve
Allow the chocolate to fully set before serving. You can let the balls sit at room temperature, where they’ll harden in about 20-30 minutes, or place them in the refrigerator to speed up the process. Once set, the Butterfinger Balls are ready to serve! Arrange them on a platter for parties or events, or store them in an airtight container in the fridge if making ahead. For special occasions, consider presenting them in decorative wrappers or as part of a dessert spread. Enjoy this easy, crowd-pleasing treat with friends and family!
Creative Variations
Butterfinger Balls are versatile and can be customized in various ways to suit different tastes and occasions. Here are a few creative variations to try:
Flavored Cream Cheese
Adding flavored cream cheese can introduce subtle notes that transform the taste of these treats. Vanilla or chocolate-flavored cream cheese adds a new dimension to the Butterfinger and chocolate combination, making the balls taste richer or more dessert-like. For a hint of autumn, consider pumpkin-spiced cream cheese, which pairs well with the candy’s sweetness and offers a seasonal twist.
Alternate Chocolate Coatings
While semi-sweet chocolate is a classic choice, using different types of chocolate can elevate the look and flavor. White chocolate creates a sweeter, creamier coating and gives a lovely contrast to the Butterfinger pieces. Milk chocolate offers a smoother, lighter taste, while dark chocolate brings a more intense, less-sweet profile. You can also experiment with swirling two types of chocolate (like dark and white) for a marbled effect that adds visual appeal.
Additional Toppings
Toppings are a great way to add texture, color, and festive flair. Crushed nuts such as almonds, pecans, or hazelnuts add a crunch that complements the candy bars. For a holiday touch, crushed candy cane pieces give a peppermint flavor and seasonal look. Additionally, consider drizzling melted white chocolate or caramel over the balls for a sophisticated finish, or adding colorful sprinkles to match holiday or party themes.
Nutritional Information and Serving Suggestions
Each Butterfinger Ball is a decadent treat, so enjoying them in moderation is key. While precise nutritional values can vary, here’s an approximate breakdown per ball (based on a 1-inch ball size):
- Calories: ~120
- Sugars: ~10g
- Fat: ~7g
- Carbohydrates: ~12g
- Protein: ~1g
These treats are rich and indulgent, making them perfect for sharing in small portions. For those mindful of sugar or calorie intake, enjoying one or two balls as a sweet finish to a meal can be a satisfying option without overindulging.
Portioning and Serving Suggestions
Butterfinger Balls are wonderfully versatile for serving at gatherings, holiday events, or even as a cozy weekend treat. For easy serving, consider placing each ball in mini cupcake liners; this not only makes them look polished but also keeps hands clean and portions controlled. Another elegant approach is to arrange them on a dessert platter, with varied toppings or drizzles to create visual interest.
For individual servings, try layering Butterfinger Balls in small mason jars with a sprinkle of crushed Butterfinger between each layer, or offer them as part of a dessert board with other bite-sized treats. These ideas make for a beautiful presentation and help guests enjoy the treats with minimal fuss.
FAQs Section
Can I make Butterfinger Balls in advance?
Yes, Butterfinger Balls are great for making ahead of time! Once prepared, store them in an airtight container in the refrigerator, where they’ll stay fresh for up to a week. If you need to store them longer, place them in the freezer for up to two months. When you’re ready to serve, bring refrigerated balls to room temperature for a few minutes, and for frozen ones, allow about 15-20 minutes to soften before serving. This flexibility makes them an ideal treat to prepare in advance for parties or as gifts.
What if I don’t have Butterfinger bars?
No worries! If Butterfinger bars aren’t available, try substituting with other crunchy, peanut-buttery candies like Reese’s Peanut Butter Cups or even crushed peanut butter cookies for a similar flavor. Alternatively, you could mix in crushed toffee or chocolate-covered peanut candies to create a unique twist on the traditional Butterfinger Balls. These alternatives can still achieve that irresistible sweet and crunchy texture.
How can I make Butterfinger Balls healthier?
To lighten up Butterfinger Balls, use reduced-fat or Neufchâtel cream cheese, which has a similar texture with less fat. You can also use dark chocolate for the coating, as it contains less sugar and may offer some added health benefits compared to milk or semi-sweet chocolate. Consider smaller portions to make bite-sized treats with fewer calories per serving.
Do I have to use vegetable shortening?
No, vegetable shortening is optional. It’s typically added to melted chocolate to achieve a smoother, shinier coating and to make dipping easier. If you prefer not to use it, your chocolate coating will still work well, though it may have a slightly thicker or matte appearance. Coconut oil can be an alternative for a similar effect, but use it sparingly as it can alter the chocolate’s taste slightly.
Can I use white chocolate instead of semi-sweet chocolate?
Absolutely! White chocolate works well and adds a sweeter, milder flavor that pairs nicely with the Butterfinger filling. White chocolate can be trickier to melt, so heat it slowly, stirring frequently to avoid scorching. If desired, you can also add a bit of vegetable shortening or coconut oil to white chocolate to make dipping easier and achieve a smoother coating.
Butterfinger Balls are a wonderfully simple yet irresistible treat that captures the rich flavors of creamy chocolate and crunchy Butterfinger candy, all in a bite-sized dessert. With just a few ingredients and straightforward steps, this no-bake recipe is perfect for beginners and seasoned bakers alike. The ease of mixing, chilling, dipping, and decorating makes it a fun and low-stress way to create a dessert that looks and tastes impressive without spending hours in the kitchen.
What’s more, Butterfinger Balls offer endless opportunities for customization. Whether you’re using flavored cream cheese, experimenting with different chocolate coatings, or adding festive toppings, each batch can be tailored to fit the season, a special occasion, or your personal taste. They’re an ideal treat for holiday parties, family gatherings, or even just a casual night in, adding a touch of sweetness that’s hard to resist.
So go ahead and give this recipe a try! You’ll find that these delicious little bites quickly become a favorite for both you and anyone lucky enough to share them. With so many creative variations to explore, Butterfinger Balls are sure to be a delightful addition to your dessert repertoire.

Butterfinger Balls
- Total Time: 50 mins
Description
These Butterfinger Balls are a creamy, crunchy, chocolate-dipped treat that combines the irresistible flavors of Butterfinger candy bars and smooth cream cheese. Perfect for parties, holidays, or anytime you crave a decadent dessert bite!
Ingredients
- 2 cups crushed Butterfinger candy bars (about 16 fun-sized bars)
- 8 oz cream cheese, softened
- 2 cups semi-sweet chocolate chips
- 1 tbsp vegetable shortening (optional, for smoother dipping)
- Optional Toppings: Butterfinger or chocolate sprinkles for decoration
Instructions
1️⃣ Prepare the Mixture: In a large mixing bowl, combine the softened cream cheese and crushed Butterfinger candy bars. Mix until well incorporated and smooth.
2️⃣ Form Balls: Using a small cookie scoop or your hands, form the mixture into 1-inch balls. Place the balls on a baking sheet lined with parchment or wax paper.
3️⃣ Chill: Refrigerate the Butterfinger balls for 30 minutes to firm them up for easier dipping.
4️⃣ Melt the Chocolate: In a microwave-safe bowl, melt the semi-sweet chocolate chips in 30-second intervals, stirring after each interval, until smooth. Add 1 tablespoon of vegetable shortening if desired for a smoother, glossier coating.
5️⃣ Dip the Balls: Remove the chilled balls from the refrigerator. Using a fork or a toothpick, dip each ball into the melted chocolate, allowing the excess chocolate to drip off before placing them back onto the parchment paper.
6️⃣ Decorate and Set: While the chocolate is still wet, sprinkle the tops with crushed Butterfinger pieces or chocolate sprinkles for extra texture and decoration.
7️⃣ Set and Serve: Allow the chocolate to fully set at room temperature, or place the tray in the refrigerator for faster setting. Serve and enjoy!
Notes
- Crushing the Butterfingers: For a fine, consistent texture, crush the Butterfinger bars in a food processor, or place them in a zip-top bag and crush with a rolling pin.
- Chilling for Dipping Ease: Chilling the formed balls before dipping helps keep their shape and prevents them from melting in the warm chocolate.
- Prep Time: 20 mins
- Cook Time: 30 mins


