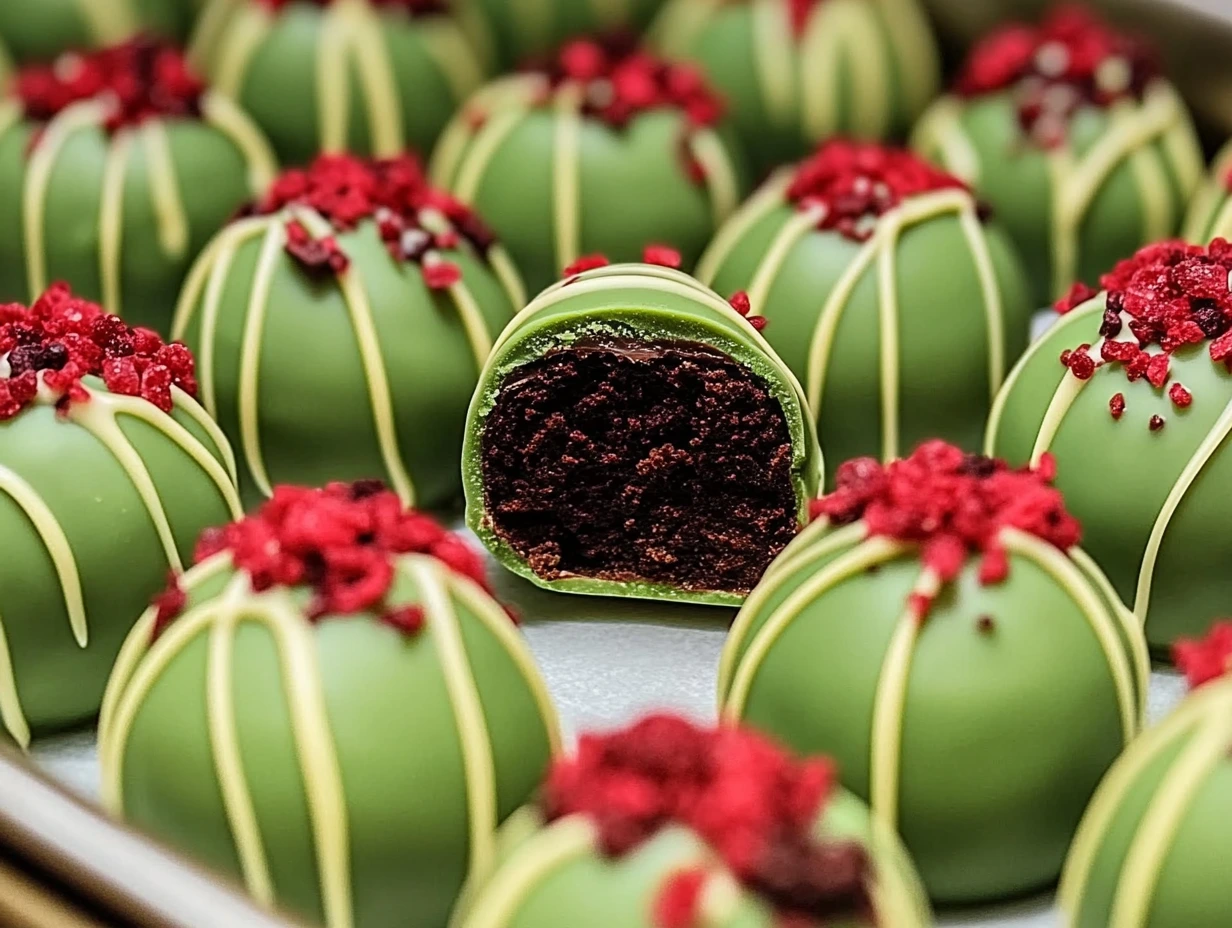
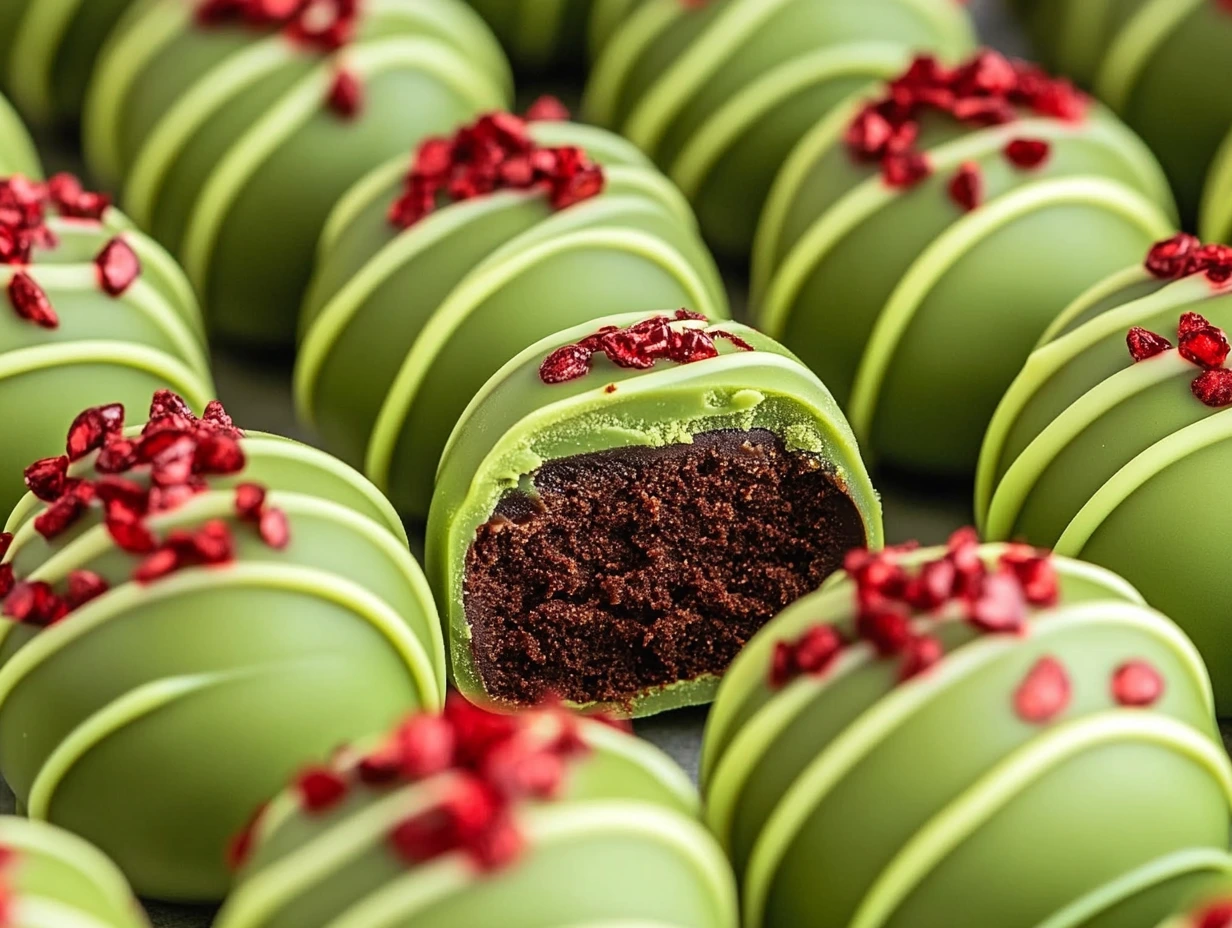
Grinch Oreo Balls are a delightful holiday treat inspired by the iconic Grinch character from Dr. Seuss’s classic story. These no-bake Oreo balls capture the playful spirit of the Grinch with their vibrant green color, a nod to the beloved character, and a small red candy heart on top that symbolizes his heart “growing three sizes.” Perfect for adding a festive touch to holiday gatherings, these Oreo balls are as fun to make as they are to eat, making them a great activity for families to enjoy together.
No-bake desserts like these are especially appealing during the busy holiday season since they save time in the kitchen and require minimal equipment. With just a few ingredients and easy steps, Grinch Oreo Balls become an inviting option for holiday gatherings, Christmas cookie exchanges, or even as edible gifts. They are a crowd-pleaser among kids and adults alike, bringing a touch of whimsy to any dessert spread.
Ingredients Needed
To make these Grinch-inspired treats, you’ll need the following ingredients:
- 24.4 ounces of Red Velvet Oreos (about 44 cookies): Red Velvet Oreos add a rich, slightly chocolatey flavor with a hint of cream cheese, enhancing the overall taste. However, you can also use regular or any seasonal flavor Oreos if Red Velvet is unavailable.
- 8 ounces of softened cream cheese: This helps bind the crushed Oreos into a smooth, creamy filling.
- 15 ounces of light green candy melts: Light green candy melts are essential for achieving the classic Grinch-green look. If needed, you can adjust the green hue with food coloring, but candy melts make it easy to achieve the right shade and consistency for dipping.
- Red candy hearts: These small heart-shaped decorations are a fun finishing touch, symbolizing the Grinch’s heart, and adding a bit of holiday color.
Ingredient Substitutions and Variations
If you can’t find Red Velvet Oreos, regular Oreos work well and still taste delicious. For those looking to make the recipe their own, consider experimenting with different candy melt colors to suit other holiday themes or characters. The light green candy melts, however, are key to the Grinch-inspired look and give these Oreo balls their signature color.
Step 1: Prepare the Baking Sheet
To begin, line a large baking sheet with parchment paper. This step is essential to prevent the Oreo balls from sticking to the sheet while you’re working with them and after they’re dipped. Using parchment paper not only makes it easier to transfer the finished Oreo balls without any fuss, but it also simplifies cleanup. If you don’t have parchment paper, a silicone baking mat can also work well. Ensuring a non-stick surface keeps each ball intact as you set them aside to chill and prevents any candy coating from sticking when you later place them back on the sheet.
Step 2: Crush the Oreos
Next, take your 44 Red Velvet Oreos (or a similar number if using another flavor) and crush them into fine crumbs. The quickest way to do this is by using a food processor; simply pulse the cookies until they break down into uniform crumbs. This method ensures a consistent texture, which makes for a smooth filling once mixed with the cream cheese. If you don’t have a food processor, you can achieve similar results by placing the cookies in a ziplock bag and crushing them with a rolling pin. The goal is to create an even mixture of fine crumbs, as larger chunks of cookie can affect the smoothness of the Oreo balls and make it more challenging to roll them into perfect spheres. Taking a bit of extra time to crush the cookies thoroughly will help your Grinch Oreo Balls achieve that ideal texture.
Step 3: Mix with Cream Cheese
Once the Oreos are crushed, it’s time to combine them with cream cheese to create a rich, truffle-like filling. Start by making sure the cream cheese is softened to room temperature, which helps it mix smoothly and prevents lumps in the final mixture. Place the cream cheese in a large mixing bowl and use an electric mixer on a low-to-medium setting to beat it until smooth and creamy. Next, add the Oreo crumbs gradually and mix until fully combined.
As you mix, ensure that every part of the Oreo crumbs is well incorporated into the cream cheese, creating a uniform, sticky dough. This step is essential to help the balls maintain their shape once rolled and prevent any crumbly textures. If needed, pause to scrape down the sides of the bowl with a spatula to get every last bit of Oreo crumbs into the mix. Once you have a smooth, fully blended mixture, you’re ready for the next step: forming the Oreo balls.
Step 4: Form the Balls
With your Oreo and cream cheese mixture ready, it’s time to shape it into balls. Using a 1.5-inch cookie scoop is an easy way to ensure uniform sizing, helping the Oreo balls to look neat and consistent. If you don’t have a cookie scoop, you can also use a spoon and roll the mixture by hand, aiming for a similar size. After scooping, roll each portion between your palms to form a smooth, round ball. The warmth of your hands helps to smooth the mixture, creating an even surface ideal for dipping. Once shaped, place each Oreo ball on the parchment-lined baking sheet. This non-stick surface allows you to set the balls aside without any risk of sticking and prepares them for chilling, which is essential for holding their shape during the dipping process.
Step 5: Chill the Oreo Balls
Chilling the Oreo balls is a crucial step to ensure they retain their shape during the dipping process. Place the tray of Oreo balls in the refrigerator for at least 2 hours. This extended chill time allows the balls to firm up, making them easier to handle and preventing them from falling apart or softening when you dip them in the warm candy coating. If you’re short on time, you can speed up the process by placing the tray in the freezer for about 30-45 minutes, though be careful not to freeze them entirely, as this can lead to cracking in the coating later on.
Step 6: Melt the Candy Coating
While the Oreo balls are chilling, prepare the light green candy coating. Using a double boiler is the best method for melting candy melts, as it allows for gentle, even heating and prevents the candy from scorching. To do this, place the green candy melts in a heat-safe bowl set over a pot of simmering water (ensuring the water doesn’t touch the bowl). Stir frequently until the candy melts are smooth and fully liquefied. For a festive touch, set aside about 1/2 cup of melted candy for drizzling later on. To keep the candy coating smooth while working, periodically give it a stir and consider keeping it warm over the double boiler, reducing the heat to low. This will keep the coating at the perfect consistency for dipping without thickening too quickly.
Step 7: Dip the Oreo Balls
Once the Oreo balls are chilled and your green candy coating is ready, it’s time to dip. Using a fork or toothpick, gently lower each Oreo ball into the melted candy coating, rolling it to ensure it’s fully covered. To achieve a clean finish, lift the ball out of the coating, tap the fork or toothpick gently against the side of the bowl to allow any excess coating to drip off, and avoid pooling at the base of each ball. Carefully transfer the dipped Oreo balls back to the parchment-lined baking sheet, leaving a bit of space between them. This setup prevents them from sticking and allows the coating to set evenly. Repeat this process for each Oreo ball, ensuring they’re all smoothly coated and ready for decorating.
Step 8: Decorate with Drizzle and Heart
For an extra festive touch, drizzle the remaining green candy melts over each Oreo ball. To do this, transfer the reserved melted candy into a small piping bag (or a ziplock bag with a tiny corner snipped off) and drizzle it back and forth over the Oreo balls for a decorative effect. This step is optional but adds a beautiful finishing touch to each ball.
After drizzling, place a red candy heart on top of each Oreo ball to complete the Grinch-inspired look. To ensure the hearts stick properly, add them immediately after dipping or drizzling, while the candy coating is still soft. Press each heart lightly to secure it in place without pushing too deeply. These little red hearts represent the Grinch’s famously growing heart, making these Oreo balls fun, themed treats that stand out at any holiday gathering.
Step 9: Set and Serve
After decorating, place the Oreo balls back in the refrigerator to allow the candy coating to fully set, which usually takes about 30 minutes. This final chill ensures the coating is firm and ready for serving or storage. If you’re making the Grinch Oreo Balls in advance, store them in an airtight container in the refrigerator, where they’ll stay fresh for up to a week. To avoid smudging, place parchment paper between layers if you need to stack them. With these tips, your Grinch Oreo Balls will look festive and fresh, perfect for holiday parties, gift exchanges, or simply sharing with family and friends.
Troubleshooting Common Issues
Creating perfectly smooth, festive Grinch Oreo Balls can sometimes involve a few challenges, but with some troubleshooting tips, you can easily overcome common issues. One frequent problem is cracking in the candy coating, which usually happens if the Oreo balls aren’t fully chilled before dipping. To avoid this, ensure that each ball is thoroughly chilled and firm. Another issue can be candy coating that doesn’t set properly, which can result from humidity or insufficient chilling after dipping. To help the coating set smoothly, always place the dipped Oreo balls in the refrigerator after decorating.
Lumps in the Oreo mixture can occur if the cream cheese isn’t fully softened or if the Oreo crumbs aren’t fine enough. To avoid lumps, bring the cream cheese to room temperature before mixing and pulse the Oreos until they form an even, crumb-like texture.
Storage Tips
Proper storage keeps Grinch Oreo Balls fresh and visually appealing. After the final chilling, transfer the Oreo balls to an airtight container and store them in the refrigerator, where they’ll stay fresh for up to a week. If you need to stack them, place a layer of parchment paper between each layer to prevent sticking and preserve their smooth coating. Alternatively, you can freeze them in a freezer-safe container for up to a month. When freezing, allow them to thaw slightly in the fridge before serving, as this helps prevent condensation on the candy coating.
Ingredient Alternatives and Customizations
You can easily customize Grinch Oreo Balls for different tastes and themes. If Red Velvet Oreos aren’t available, feel free to use classic, chocolate, or even holiday-themed Oreos. For the coating, green candy melts are ideal for the Grinch look, but you can substitute them with white chocolate and add a few drops of green food coloring if needed. Swap the red candy hearts for other decorations, like holiday sprinkles or stars, to make the Oreo balls suitable for various events. You can also adjust the color of the coating for other holidays—think pastels for Easter or red and white for Valentine’s Day—making this recipe versatile and adaptable for any occasion.
Presentation Ideas
To make Grinch Oreo Balls the highlight of your holiday dessert spread, consider a few festive presentation ideas. Arrange them on a decorative holiday tray, perhaps one with a Christmas or Grinch-themed design, to make them stand out. Placing each Oreo ball in a mini cupcake liner adds an elegant, tidy look and prevents them from sticking together. For added flair, sprinkle a little edible glitter or green and red holiday sprinkles around the tray or lightly on top of the Oreo balls for extra sparkle. Another fun touch is to place the Oreo balls in a tiered display with other holiday treats, creating a dessert centerpiece that’s sure to impress.
Creative Variations on the Recipe
For a festive twist, try adding a hint of mint extract to the Oreo mixture to evoke classic holiday flavors. Mint pairs perfectly with the Oreo and chocolate notes, creating a refreshing and seasonal flavor profile. You can also create bite-sized versions by making smaller Oreo balls, ideal for serving as a part of a holiday dessert sampler or for gatherings where guests can enjoy them as easy finger food. These mini Oreo balls are equally festive and allow for mixing different flavors in one batch, like alternating mint, classic, or even peanut butter variations, giving guests a delightful variety to sample.
How far in advance can I make Grinch Oreo Balls?
You can make Grinch Oreo Balls up to a week in advance. Store them in an airtight container in the refrigerator to keep them fresh. If you need to make them further ahead, you can freeze them for up to a month, then thaw them in the refrigerator before serving.
Can I use regular Oreos instead of Red Velvet?
Yes, regular Oreos work perfectly well if Red Velvet Oreos are unavailable. They’ll provide a classic Oreo flavor, and you can still achieve the Grinch-green effect with the candy melts and red heart decoration.
How do I keep the candy coating from cracking?
To prevent the candy coating from cracking, make sure the Oreo balls are thoroughly chilled but not frozen before dipping. Also, allow them to set in the refrigerator rather than at room temperature, which helps maintain a smooth, crack-free coating.
Are there dairy-free or vegan alternatives for this recipe?
Yes, you can make dairy-free or vegan Grinch Oreo Balls by using dairy-free cream cheese and vegan-friendly sandwich cookies. For the candy coating, look for vegan chocolate or candy melts in the appropriate color, and double-check that your decorations are vegan-friendly.
What’s the best way to store them if I want to make them ahead?
To store Grinch Oreo Balls ahead of time, place them in an airtight container in the refrigerator. If stacking them, separate layers with parchment paper to prevent sticking. For longer storage, freeze them in a freezer-safe container, and allow them to thaw in the fridge before serving.
Grinch Oreo Balls are a simple, festive treat that brings holiday cheer with minimal effort. With only a few ingredients and easy, no-bake steps, these delightful green Oreo balls capture the whimsical charm of the Grinch while adding a touch of fun to any holiday gathering. This recipe is perfect for creating lasting memories with family and friends, especially as a fun project for kids. To enjoy them at their best, keep them chilled until serving, and consider making a batch ahead of time to have on hand for holiday get-togethers. Enjoy this holiday treat fresh, festive, and full of joy!
Print
Grinch Oreo Balls
- Total Time: 2 hours 20 mins
Description
These adorable Grinch Oreo Balls are the perfect holiday treat, made with red velvet Oreos and coated in festive green candy melts. They’re creamy, sweet, and topped with a cute red candy heart for a Grinchy twist!
Ingredients
- 24.4 ounces Red Velvet Oreos (about 44 cookies)
- 8 ounces cream cheese, softened to room temperature
- 15 ounces light green candy melts
- Red candy hearts (for decoration)
Instructions
1️⃣ Prepare the Baking Sheet: Line a large baking sheet with parchment paper.
2️⃣ Crush the Oreos: In a food processor, add the Oreo cookies and pulse until fine crumbs form. (Alternatively, place the cookies in a ziplock bag and crush with a rolling pin.)
3️⃣ Mix with Cream Cheese: In a large mixing bowl, add the softened cream cheese and beat with an electric mixer until smooth. Add the Oreo crumbs and mix until fully combined.
4️⃣ Form the Balls: Using a 1.5-inch cookie scoop, scoop the mixture and roll into smooth balls with your hands. Place them on the prepared baking sheet.
5️⃣ Chill: Place the tray in the refrigerator for at least 2 hours to help the balls hold their shape before dipping.
6️⃣ Melt the Candy Coating: In a double boiler over low heat, melt the green candy melts, stirring often until smooth. Set aside 1/2 cup of the melts for optional drizzling.
7️⃣ Dip the Balls: Using a fork or toothpick, dip each chilled Oreo ball into the melted candy coating, letting excess drip off. Place them back on the baking sheet.
8️⃣ Add Drizzle and Heart (optional): For extra decoration, drizzle leftover candy melts over each coated ball. You can do this by placing the reserved 1/2 cup of candy melts in a piping bag, microwaving in 30-second intervals on low until melted, and snipping a small tip for drizzling. Immediately place a red candy heart on top of each ball.
9️⃣ Set: Place the decorated Oreo balls in the refrigerator to fully set before serving.
Notes
- Flavor Swaps: Try using different Oreo flavors, like classic chocolate or peppermint, for a new twist.
- Avoid Overheating: When melting candy, use low heat or a defrost setting in the microwave to prevent it from seizing.
- Storage: Store in an airtight container in the fridge for up to a week.
- Prep Time: 20 mins
- Cook Time: 2 hours


