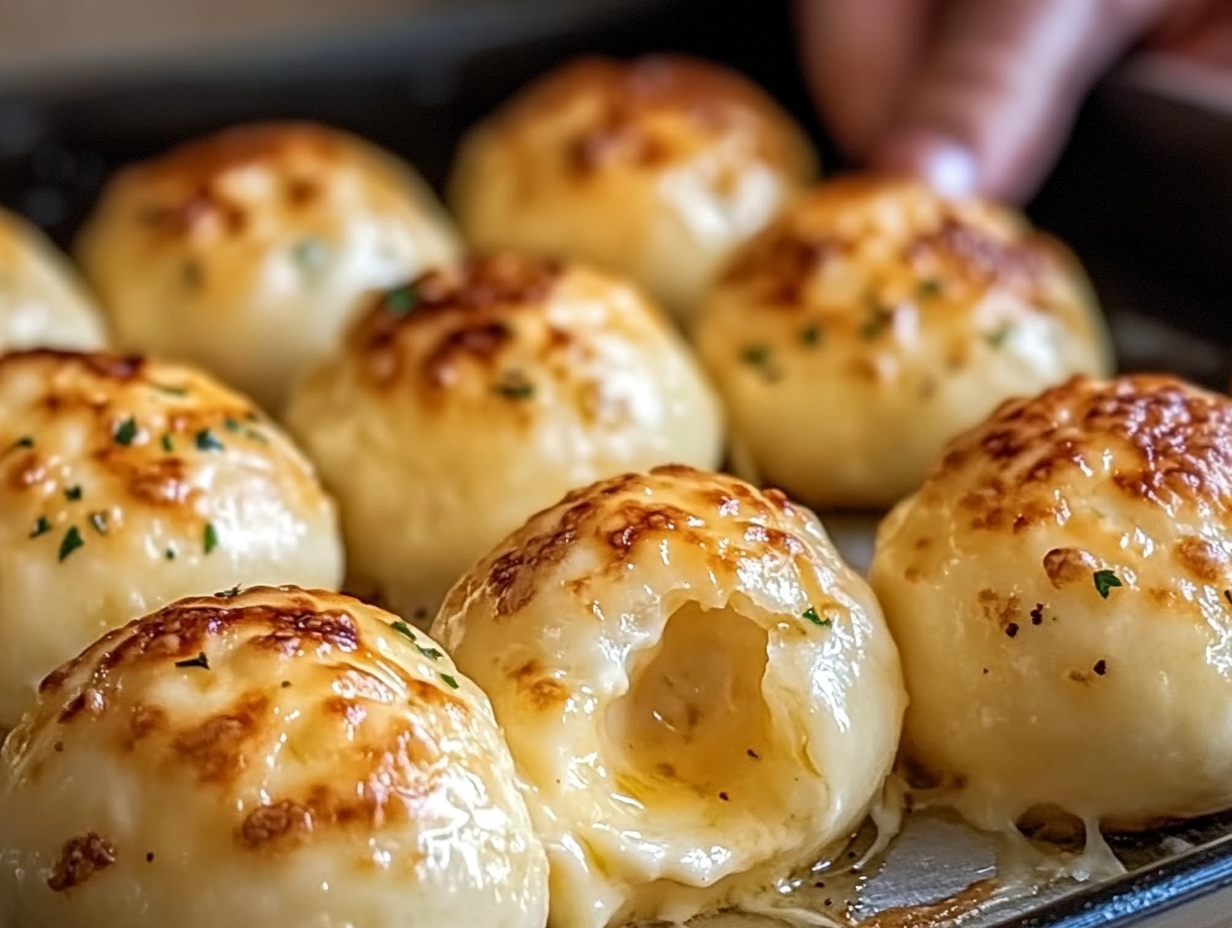
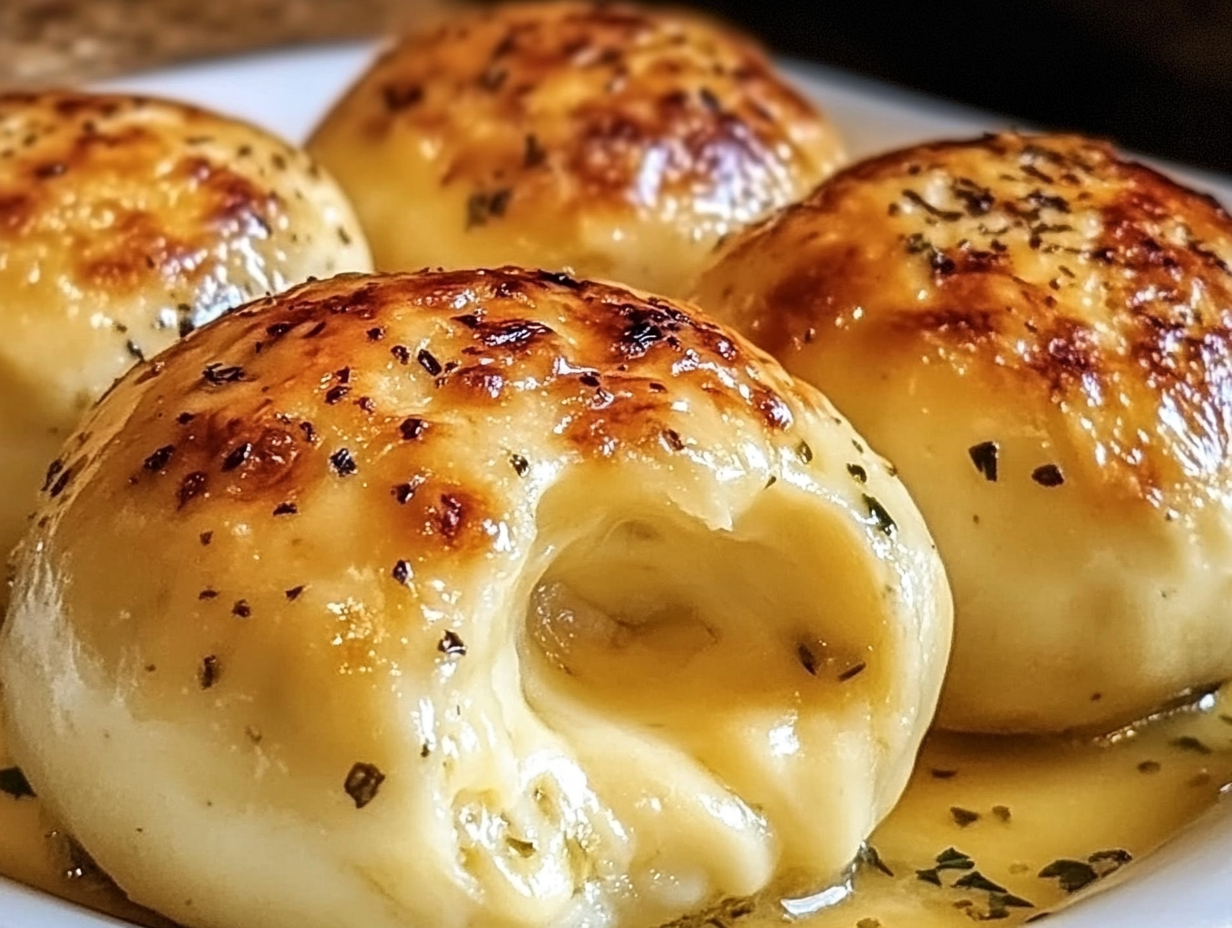
Garlic Butter Cheese Bombs are a delectable, bite-sized treat that combine fluffy biscuit dough with gooey mozzarella cheese, all coated in a rich, flavorful garlic butter. What makes these cheese bombs so special is their perfect balance of savory flavors and satisfying textures. The buttery, garlicky exterior contrasts beautifully with the melty cheese center, creating a mouthwatering experience in every bite. Whether you’re serving them as an appetizer, snack, or side dish, these cheese bombs are bound to be a hit at any gathering.
Cheesy, buttery dishes have always been crowd-pleasers. From classic garlic bread to stuffed crust pizza, these comfort foods resonate with people because they offer indulgence in every bite. The irresistible combination of creamy cheese and fragrant garlic butter appeals to both kids and adults, making these cheese bombs a universally loved dish. Their simple yet delicious nature makes them a go-to option when you need something satisfying, easy, and comforting.
Garlic Butter Cheese Bombs are incredibly versatile and can be enjoyed at a wide range of occasions. Whether you’re hosting a dinner party, preparing an appetizer for a family meal, or simply craving a delicious snack, these cheese bombs will always hit the spot. They’re quick and easy to make, ensuring that you can enjoy them at a moment’s notice, and their cheesy, buttery allure makes them a guaranteed crowd-pleaser.
Why You’ll Love These Garlic Butter Cheese Bombs
These cheese bombs bring together two of the most beloved flavors: gooey cheese and savory garlic butter. The combination is irresistible, providing a delightful contrast between the soft, pillowy biscuit and the molten cheese center. Each bite is a warm, gooey indulgence!
Making these cheese bombs is incredibly simple, using just a handful of common ingredients. Refrigerated biscuit dough, mozzarella cheese, and a few pantry staples like butter, garlic powder, and Italian seasoning are all you need. No fancy equipment or special skills are required—just follow the easy steps, and you’ll have a delicious dish in no time.
The recipe is also highly customizable. You can swap out the mozzarella for different cheeses like cheddar, pepper jack, or a blend of your favorites. You can also adjust the seasoning to your taste, adding a bit of heat with chili flakes or enhancing the flavor with herbs like basil or thyme. The options are endless!
Ingredients
Refrigerated Biscuit Dough
Refrigerated biscuit dough is a game-changer when it comes to convenience and ease. It simplifies the process of making garlic butter cheese bombs, eliminating the need to prepare dough from scratch. The dough is pre-portioned and ready to go, cutting down prep time significantly. It provides the perfect texture—fluffy on the inside with a slightly crispy exterior—without requiring any advanced baking skills.
While refrigerated biscuit dough is quick and convenient, you can also use homemade biscuit dough if you prefer a more personalized touch. Simple biscuit recipes, made with flour, baking powder, butter, and milk, can be easily substituted. If you have the time, homemade dough can offer a slightly more flaky and tender texture, but it’s entirely optional.
Mozzarella Cheese (Shredded or String Cheese)
Mozzarella is the ideal cheese for garlic butter cheese bombs due to its mild, creamy flavor and exceptional melting quality. It offers the perfect balance of stretchiness and richness without overpowering the other flavors in the dish. The cheese becomes wonderfully gooey inside the biscuit, creating that irresistible melty center.
You have two great options when it comes to mozzarella: shredded or string cheese. Shredded mozzarella is easier to work with, as it melts smoothly and evenly throughout the biscuit. However, using string cheese adds a fun twist; simply cut it into small pieces to stuff inside each dough ball. Either option works well depending on your preference.
Melted Butter
Melted butter plays a crucial role in both flavor and texture. It helps bind the seasoning to the biscuit dough while infusing the garlic butter mixture with richness. As the butter coats the outside of each cheese bomb, it contributes to that golden, crispy finish.
To ensure the butter doesn’t cool and solidify too quickly, make sure to use warm, freshly melted butter. If it begins to firm up, gently reheat it until it’s liquid again. This helps maintain a smooth consistency when brushing it onto the dough.
Garlic Powder & Italian Seasoning
Garlic powder is a key ingredient that adds depth of flavor to the garlic butter mixture. Its concentrated, savory taste ensures that each cheese bomb is infused with a rich garlic essence without being overwhelming.
Italian seasoning balances the flavors by introducing herbal notes like oregano, basil, and thyme. These herbs complement the garlic while elevating the dish, creating a well-rounded and aromatic flavor profile.
Salt
A pinch of salt is essential for enhancing the overall flavor of the garlic butter cheese bombs. It helps bring out the natural flavors of the cheese, butter, and seasonings, ensuring that each bite is perfectly seasoned without being too salty.
Step-by-Step Instructions
Step 1: Preheat the Oven
Preheating the oven is an essential first step to ensure that the cheese bombs bake evenly and achieve the perfect texture. If the oven isn’t fully heated before placing the dough in, the biscuits may cook unevenly or take longer than necessary. Preheating helps activate the baking process immediately, giving you a crisp, golden finish.
Set the oven to 375°F (190°C) for optimal results. This temperature is ideal for baking biscuit dough, as it ensures the biscuits rise properly while also giving the garlic butter a chance to brown and crisp up.
Step 2: Prepare the Biscuit Dough
Open the refrigerated biscuit dough and carefully separate each biscuit. You should have 8 pieces in total. Place them on a flat surface, and use your hands or a rolling pin to gently flatten each biscuit into a 3-inch circle. Flattening them evenly is crucial to ensure the cheese melts uniformly and the dough cooks evenly around the filling.
To ensure the circles are uniform in size, press gently with your fingers or roll each biscuit into a consistent thickness. This will help ensure that each cheese bomb bakes evenly and cooks through at the same rate.
Step 3: Add the Cheese
Place a small amount of cheese (about 1-2 tablespoons) in the center of each flattened dough circle. The mozzarella should be enough to give you a gooey filling without overwhelming the dough. If you’re using string cheese, slice it into 2-3 pieces per biscuit for that perfect bite.
While mozzarella is the traditional choice, you can experiment with other cheeses such as cheddar, pepper jack, or a cheese blend for a different flavor profile. These cheeses melt well and will add a nice twist to the dish.
Step 4: Form the Cheese Bombs
To form the cheese bombs, gently fold the edges of the dough up and over the cheese, pinching the seams tightly to fully seal the cheese inside. The key is to avoid leaving any gaps where the cheese could leak out during baking. Ensuring the dough is tightly sealed will also help the cheese stay inside as it melts.
For a perfect fold, start by lifting the edges of the dough, bringing them toward the center, and pressing them together firmly. If necessary, you can use your fingers to pinch the seams tightly and ensure a secure seal.
Step 5: Arrange on the Baking Sheet
Place the sealed cheese bombs on a parchment-lined baking sheet, making sure to arrange them with a little space between each one. This will allow for even baking and ensures that they cook evenly without sticking together.
To prevent sticking, you can lightly grease the baking sheet with cooking spray or use parchment paper, which will also make cleanup easier. This will also help ensure that the cheese bombs have enough space to puff up as they bake.
Step 6: Make the Garlic Butter Sauce
In a small bowl, combine the melted butter, garlic powder, Italian seasoning, and a pinch of salt. Stir well to ensure the seasoning is evenly distributed throughout the butter. This garlic butter mixture will coat the cheese bombs, infusing them with that rich, savory flavor.
If you prefer a stronger garlic flavor, you can increase the garlic powder or even add a small amount of fresh minced garlic. Adjusting the Italian seasoning to your taste will allow you to control the herb balance in the dish.
Step 7: Brush with Seasoned Butter
Using a pastry brush, generously coat the tops of each cheese bomb with the garlic butter mixture. Be sure to cover each one evenly so the garlic and buttery goodness soaks into the biscuit dough, helping it brown beautifully in the oven.
This step not only enhances the flavor of the cheese bombs but also ensures they get that beautiful golden-brown finish as they bake. The butter creates a crisp outer layer while infusing each bomb with a savory garlic aroma.
Step 8: Bake
Place the baking sheet in the preheated oven and bake the cheese bombs for 12-15 minutes, or until they’re golden brown and the cheese inside is fully melted. Keep an eye on them during the last few minutes to ensure they don’t over-brown.
To check if the cheese bombs are done, look for a rich golden color on the top and around the edges. If you gently press on one, you should feel a soft, puffy biscuit texture, and the cheese should be melty inside.
Step 9: Serve and Enjoy
Once the cheese bombs are done, remove them from the oven and let them cool for a minute or two. Serve them while they’re warm for the best experience, as the cheese will still be gooey and the flavor will be at its peak.
These garlic butter cheese bombs pair perfectly with a variety of dipping sauces, such as marinara, ranch dressing, or even a spicy buffalo sauce. Whether you serve them as an appetizer, snack, or side dish, they’re sure to be a hit at any occasion, from family dinners to parties and gatherings.
Tips for Perfect Garlic Butter Cheese Bombs
How to Make Sure the Cheese Doesn’t Leak
Sealing the dough tightly around the cheese is essential to prevent any leaks during baking. Be sure to pinch the dough firmly at the seams after folding the edges over the cheese. This will ensure the cheese stays contained inside as it melts.
If leaks occur, don’t worry! Simply check the dough for weak points where it might not have been sealed properly. You can press the seams together again and gently roll it back into a ball, or bake it as is, but be prepared for some cheese to spill out. Using a bit of extra dough to patch the seams can also help in a pinch.
Ways to Customize Your Cheese Bombs
Get creative by experimenting with different cheeses to suit your taste. Cheddar adds a sharper flavor, while pepper jack introduces a bit of heat. You could also use a cheese blend for extra depth, or even switch things up with a combination of cheeses like mozzarella and gouda for a richer, smokier flavor.
You can also enhance your cheese bombs with additional herbs or seasonings. Try adding fresh basil, thyme, or rosemary to the garlic butter for a fragrant, herby note. Alternatively, a dash of crushed red pepper flakes or a sprinkle of parmesan inside the dough can elevate the flavor profile even more, making each bite unique.
FAQs
Can I use homemade biscuit dough instead of refrigerated dough?
Yes, you can use homemade biscuit dough instead of refrigerated dough. Simply prepare your dough from scratch, roll it out to the desired size, and follow the rest of the instructions. Homemade dough can give a flakier texture and a more personalized touch.
What can I use instead of mozzarella cheese?
While mozzarella is the classic choice, you can substitute it with other cheeses like cheddar, pepper jack, or gouda for a different flavor profile. Cheddar provides a sharper taste, while pepper jack adds a bit of heat and spice, offering exciting variations for your cheese bombs.
Can I make these garlic butter cheese bombs ahead of time?
Yes, you can prep the cheese bombs ahead of time. After forming them, you can store them in the refrigerator for up to 24 hours before baking. Just be sure to let them sit at room temperature for a few minutes before baking to ensure even cooking.
Can I freeze these cheese bombs?
Absolutely! You can freeze the unbaked cheese bombs for up to 3 months. Arrange them on a baking sheet to freeze individually before transferring them to an airtight container. To bake, simply add a few extra minutes to the cooking time.
What dipping sauces pair well with garlic butter cheese bombs?
Garlic butter cheese bombs are delicious with a variety of dipping sauces. Classic marinara sauce offers a tangy contrast to the buttery flavors, while ranch dressing adds creaminess. For a spicy kick, try pairing them with buffalo sauce or a zesty garlic aioli.
Conclusion
Garlic butter cheese bombs are a crowd-pleasing treat that combines gooey cheese and savory garlic butter in a bite-sized, irresistible form. Their rich flavor and easy preparation make them perfect for any occasion, whether as an appetizer, snack, or party treat.
Don’t be afraid to get creative with the recipe—experiment with different cheeses, seasonings, or add-ins to make these cheese bombs your own. The versatility of this dish makes it suitable for a variety of tastes and events, ensuring they’ll be a hit wherever you serve them!
Print
Homemade Garlic Butter Cheese Bombs
- Total Time: 22-25 mins
Description
Homemade Garlic Butter Cheese Bombs are a savory, melt-in-your-mouth treat that combines the irresistible flavors of warm, buttery garlic and gooey melted cheese, all wrapped in a soft, golden biscuit.
Ingredients
Ingredients:
- 1 (16 oz) container refrigerated biscuit dough (8 biscuits)
- 4 ounces mozzarella cheese (shredded or diced string cheese)
- 4 tablespoons melted butter (half a stick)
- 1 teaspoon garlic powder
- 1 teaspoon Italian seasoning
- Pinch of salt
Instructions
1️⃣ Preheat the oven: Set your oven to 375°F (190°C). Line a baking sheet with parchment paper or lightly grease it to prevent sticking.
2️⃣ Prepare the biscuit dough: Open the container of refrigerated biscuit dough and separate each biscuit. Flatten each biscuit into a 3-inch circle using your hands or a rolling pin.
3️⃣ Add the cheese: Place a piece of mozzarella cheese (either shredded or cut from string cheese) in the center of each dough circle.
4️⃣ Form the cheese bombs: Carefully fold the edges of the dough up and over the cheese, pinching them together to form a sealed ball. Make sure the seams are tightly closed to prevent the cheese from leaking out while baking.
5️⃣ Arrange on the baking sheet: Place the cheese-filled biscuit balls seam-side down on the prepared baking sheet, ensuring they’re spaced a little apart for even baking.
6️⃣ Make the garlic butter sauce: In a small bowl, combine the melted butter, garlic powder, Italian seasoning, and a pinch of salt. Stir to mix well.
7️⃣ Brush with seasoned butter: Using a brush, generously coat the tops of each biscuit bomb with the seasoned garlic butter mixture.
8️⃣ Bake: Place the baking sheet in the preheated oven and bake for 12-15 minutes, or until the biscuit bombs are golden brown and the cheese inside is melted and gooey.
9️⃣ Serve and enjoy: Serve these garlic butter cheese bombs warm, either on their own or with your favorite dipping sauce. They’re perfect as an appetizer, snack, or side dish!
Notes
- Cheese options: While mozzarella is classic, feel free to experiment with other cheeses like cheddar, provolone, or a blend for added flavor.
- Dipping sauces: These cheese bombs pair wonderfully with marinara, ranch dressing, or a creamy garlic dip for extra flavor.
- Storage tip: Leftovers can be stored in an airtight container at room temperature for up to 2 days or in the fridge for up to 5 days. Reheat them in the oven for the best texture.
- Prep Time: 10 mins
- Cook Time: 12-15 mins


