

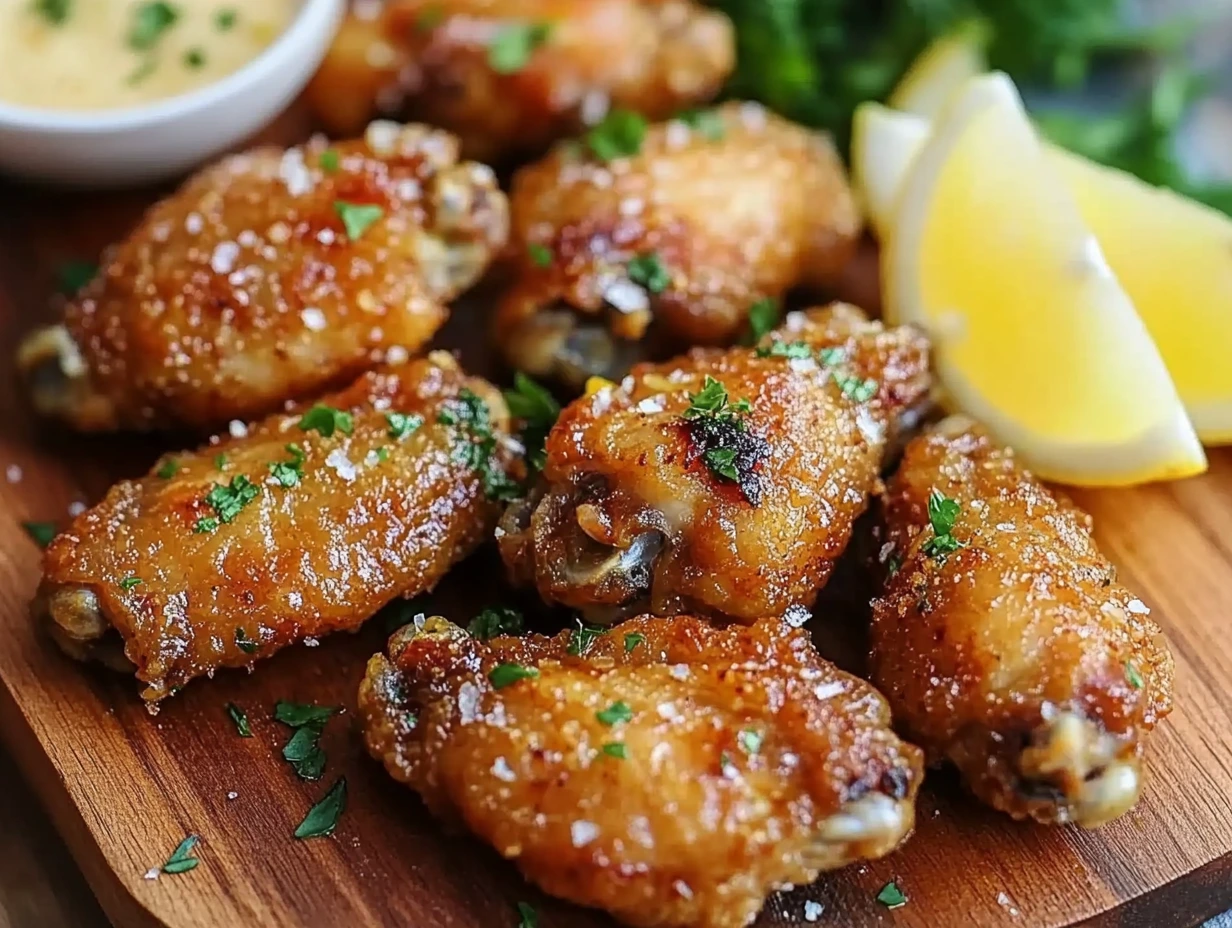
Let’s be honest—who doesn’t love a plate of crispy, flavorful chicken wings? Whether it’s game night, a backyard barbecue, or a casual dinner at home, chicken wings always bring a little something extra to the table. And when you throw in the bright, zesty punch of lemon and the bold flavor of garlic? Well, you’ve got yourself a dish that’s not just a snack but an event!
This recipe for Baked Lemon Garlic Chicken Wings is one of my all-time favorites. Why? It’s easy to prepare, doesn’t require deep frying (hello, less mess!), and bursts with fresh, citrusy goodness. Plus, baking these wings makes them a slightly healthier option without sacrificing any of that addictive crispiness we all crave.
Why Lemon Garlic Wings?
Lemon and garlic are a match made in culinary heaven. Lemon adds a refreshing tanginess, while garlic brings warmth and depth. Together, they elevate simple chicken wings into something truly special. And the best part? These wings are baked to golden perfection, making them a fuss-free yet impressive dish that’ll have everyone asking for seconds.
Now, let’s dive into how to make these crispy, zesty delights step by step!
Step 1: Prepare the Chicken Wings
To kick things off, you’ll need about 2 pounds of chicken wings. This usually works out to around 12–16 pieces, depending on the size. If you’ve got whole wings, you might want to break them down into flats and drumettes. Trust me, this makes them easier to eat and cook more evenly. (Don’t toss those wing tips, though—they’re perfect for making stock later!)
Before we get to the fun stuff—marinating—you’ll want to pat those wings dry with a paper towel. This might seem like a small step, but it’s crucial for achieving that beautifully crisp skin in the oven.
Step 2: The Lemon Garlic Marinade
Here’s where the magic happens. In a large mixing bowl, whisk together:
- 2 tablespoons of olive oil
- 5 cloves of garlic, minced (or 2 teaspoons of garlic powder if you’re in a pinch)
- 2 tablespoons of freshly squeezed lemon juice
- 1 teaspoon of lemon zest
- 1 teaspoon each of paprika and Italian seasoning
- ½ teaspoon each of salt and black pepper
The olive oil ensures the wings stay juicy, while the lemon juice and zest provide a vibrant citrusy kick. Paprika and Italian seasoning? They round out the flavor profile with just the right balance of smokiness and herbiness.
Add the chicken wings to the bowl and toss them until every piece is generously coated in this aromatic marinade. At this point, your kitchen will already start smelling amazing! Cover the bowl with plastic wrap and let the wings marinate in the fridge for at least 30 minutes. If you’ve got the time, let them sit overnight—the longer, the better when it comes to flavor.
Step 3: Prepping for the Oven
While your wings soak up all that garlicky, lemony goodness, preheat your oven to 400°F (200°C). This temperature is just right for giving the wings that perfect crispy exterior while keeping the inside tender and juicy.
For an easy cleanup (trust me, you’ll thank me later), line a baking sheet with parchment paper or a silicone mat. Want extra crispy wings? Place a wire rack over the baking sheet and arrange the wings in a single layer. The air circulation around the wings will give you that irresistible crunch without any frying.
Step 4: Baking the Wings to Perfection
Now that your chicken wings are prepped and ready, it’s time to let the oven work its magic. Place the baking sheet with the arranged wings into your preheated oven at 400°F (200°C). Set your timer for 25–30 minutes, flipping the wings halfway through to ensure they cook evenly.
Pro Tip: Use tongs or a spatula to flip the wings carefully. This helps to keep that glorious marinade intact and prevents sticking to the rack or parchment paper.
While the wings bake, the olive oil and chicken fat work together to create that beautiful, crispy exterior. The paprika helps enhance their golden-brown hue, making them look as amazing as they taste.
Step 5: The Finishing Touch – Broiling for Crispiness
If you’re a fan of ultra-crispy wings (who isn’t?), the broiler is your best friend. Once the wings have baked for 25–30 minutes and are cooked through, crank up the broiler. Let the wings sit under the broiler for an additional 1–2 minutes.
Watch Closely! The broiler can go from “perfectly crisp” to “charred beyond recognition” in the blink of an eye, so don’t step away. This quick broil intensifies the flavors and adds that irresistible crunch you’re looking for.
Step 6: Garnish and Serve
Here’s where you can truly make these wings shine. Once they’re out of the oven, let them rest for a couple of minutes on the wire rack. This keeps the bottoms crispy instead of soggy from residual heat.
For the final flourish:
- Sprinkle with chopped fresh parsley for a pop of color and herbaceous flavor.
- Serve alongside lemon wedges, so everyone can squeeze a little extra zing over their wings just before digging in.
Pair these wings with your favorite dipping sauces—ranch, blue cheese, or even a spicy aioli for an extra kick. Or, if you’re feeling adventurous, whip up a quick garlic-lemon yogurt dip to complement the wings’ tangy flavors.

Pro Tips for the Best Lemon Garlic Chicken Wings
Making these wings is straightforward, but a few tips can take them to the next level:
- Pat the Wings Dry: I can’t stress this enough. Removing moisture from the wings before marinating helps the skin crisp up beautifully in the oven.
- Marinate Overnight: While 30 minutes works in a pinch, overnight marination intensifies the lemon and garlic flavors, making every bite a zesty explosion of flavor.
- Don’t Overcrowd the Baking Sheet: Give your wings space! Overcrowding traps steam, which can lead to soggy skin instead of the crispy finish you’re aiming for.
- Use a Meat Thermometer: Chicken wings are fully cooked when they reach an internal temperature of 165°F (74°C). A meat thermometer ensures they’re safe to eat and prevents overcooking.
- Experiment with Garnishes: Besides parsley, try garnishing with grated Parmesan cheese for a savory twist or red pepper flakes for a hint of spice.
Bonus Variations
This recipe is incredibly versatile, and you can easily tweak it to suit your taste buds:
- Honey Lemon Wings: Add a tablespoon of honey to the marinade for a touch of sweetness that caramelizes beautifully during baking.
- Spicy Lemon Wings: Mix in a teaspoon of red chili flakes or a dash of cayenne pepper to the marinade for an extra kick.
- Herb Lovers’ Delight: Amp up the Italian seasoning or sprinkle freshly chopped rosemary or thyme over the wings before baking.
By the time these wings come out of the oven, your kitchen will smell absolutely divine, and you’ll be ready to impress your family, friends, or even just yourself.
Frequently Asked Questions
Q1: Can I use frozen chicken wings for this recipe?
Yes, but make sure to thaw them completely before marinating. Thawing ensures the marinade penetrates fully and prevents excess water from affecting the crispiness during baking.
Q2: How do I store leftover chicken wings?
Leftovers can be stored in an airtight container in the refrigerator for up to 3 days. To reheat, bake in the oven at 350°F (175°C) for 10–12 minutes to restore their crispiness. Avoid microwaving, as it can make the wings soggy.
Q3: Can I make these wings ahead of time?
Absolutely! You can marinate the wings a day in advance, then bake them fresh when ready to serve. This not only saves time but also enhances the flavor.
Q4: What can I serve with these wings?
These wings pair beautifully with crunchy celery sticks, carrot sticks, and creamy dips like ranch or blue cheese. For a heartier meal, serve them alongside roasted potatoes, coleslaw, or a fresh green salad.
Q5: Can I make these wings spicier?
Yes! Add chili flakes, cayenne pepper, or a dash of hot sauce to the marinade for extra heat. You can also sprinkle some red pepper flakes over the wings after baking.
Q6: Can I grill these wings instead of baking them?
Definitely! Grill the wings over medium heat for about 20–25 minutes, turning occasionally, until they’re crispy and cooked through. The grill will add a smoky flavor that complements the lemon and garlic perfectly.
Q7: What’s the secret to ultra-crispy baked wings?
The combination of patting the wings dry, using a wire rack for baking, and broiling them at the end ensures maximum crispiness. Also, avoid overcrowding the baking sheet so each wing gets ample airflow.
Conclusion: Your New Favorite Wings Recipe
There you have it—crispy, juicy, and packed with bold flavors, these Baked Lemon Garlic Chicken Wings are a guaranteed crowd-pleaser. Whether you’re hosting game night, planning a cozy dinner, or just treating yourself, this recipe delivers the perfect balance of zesty citrus and warm garlic in every bite.
What I love most about these wings is their versatility. You can keep them simple with the classic lemon-garlic combo or experiment with variations like honey, spice, or fresh herbs to suit your taste. Plus, since they’re baked and not fried, you can enjoy them guilt-free without sacrificing any of that irresistible crispiness.
If you try this recipe, I’d love to hear how it turned out for you! Share your tips, variations, and photos in the comments below. And don’t forget to pair these wings with your favorite sides and a refreshing drink—lemonade, anyone?
So what are you waiting for? Grab those wings, preheat that oven, and let’s get cooking!
Call to Action:
Tried this recipe? Share your thoughts in the comments and tag me on social media with your creations! Don’t forget to bookmark this page for your next wing night. Enjoy!
Print
Baked Lemon Garlic Chicken Wings
- Total Time: 1 hour 15 mins
Description
These baked lemon garlic chicken wings are irresistibly crispy and bursting with zesty, garlicky flavor. Perfect for game day, parties, or a satisfying snack, they’re a healthier alternative to fried wings and incredibly easy to make!
Ingredients
For the Wings:
- 2 pounds chicken wings (about 12–16 wings)
- 2 tablespoons olive oil
- 5 cloves garlic, minced (or 2 teaspoons garlic powder)
- 2 tablespoons lemon juice, freshly squeezed
- 1 teaspoon lemon zest
- 1 teaspoon paprika
- 1 teaspoon Italian seasoning
- ½ teaspoon salt (or to taste)
- ½ teaspoon black pepper
Optional Garnish:
- 2 tablespoons fresh parsley, chopped
- Lemon wedges, for serving
Instructions
1️⃣ Prepare the Chicken Wings:
Pat the chicken wings dry with paper towels to remove excess moisture, ensuring crispiness when baking.
If using whole wings, separate them into flats and drumettes. (Optional: discard or save the tips for making stock.)
2️⃣ Marinate the Wings:
In a large mixing bowl, combine olive oil, minced garlic, lemon juice, lemon zest, paprika, Italian seasoning, salt, and pepper.
Add the chicken wings to the bowl and toss until evenly coated with the marinade.
Cover with plastic wrap and refrigerate for at least 30 minutes (overnight for maximum flavor).
3️⃣ Preheat the Oven:
Preheat your oven to 400°F (200°C).
4️⃣ Prepare the Baking Sheet:
Line a baking sheet with parchment paper or a silicone mat for easy cleanup.
For crispier wings, place a wire rack over the baking sheet. Arrange the wings on the rack in a single layer to allow air circulation.
5️⃣ Bake the Wings:
Bake the wings in the preheated oven for 25-30 minutes, flipping halfway through.
Check for doneness: the wings should be golden brown, crispy on the outside, and reach an internal temperature of 165°F (74°C).
For extra crispiness, broil the wings for an additional 1-2 minutes, watching carefully to avoid burning.
6️⃣ Garnish and Serve:
Optionally, sprinkle with fresh parsley and serve with lemon wedges for an added citrusy touch.
Enjoy your zesty, garlic-infused wings hot and crispy!
Notes
- Storage: Leftover wings can be stored in an airtight container in the fridge for up to 3 days. Reheat in the oven to restore crispiness.
- Make Ahead: Marinate the wings overnight to deepen the flavor, making this dish even easier to prepare on the day of serving.
- Customizations: Adjust spices to taste—add chili flakes or cayenne for a spicy kick!
- Prep Time: 15 mins
- Cook Time: 1 hour
