

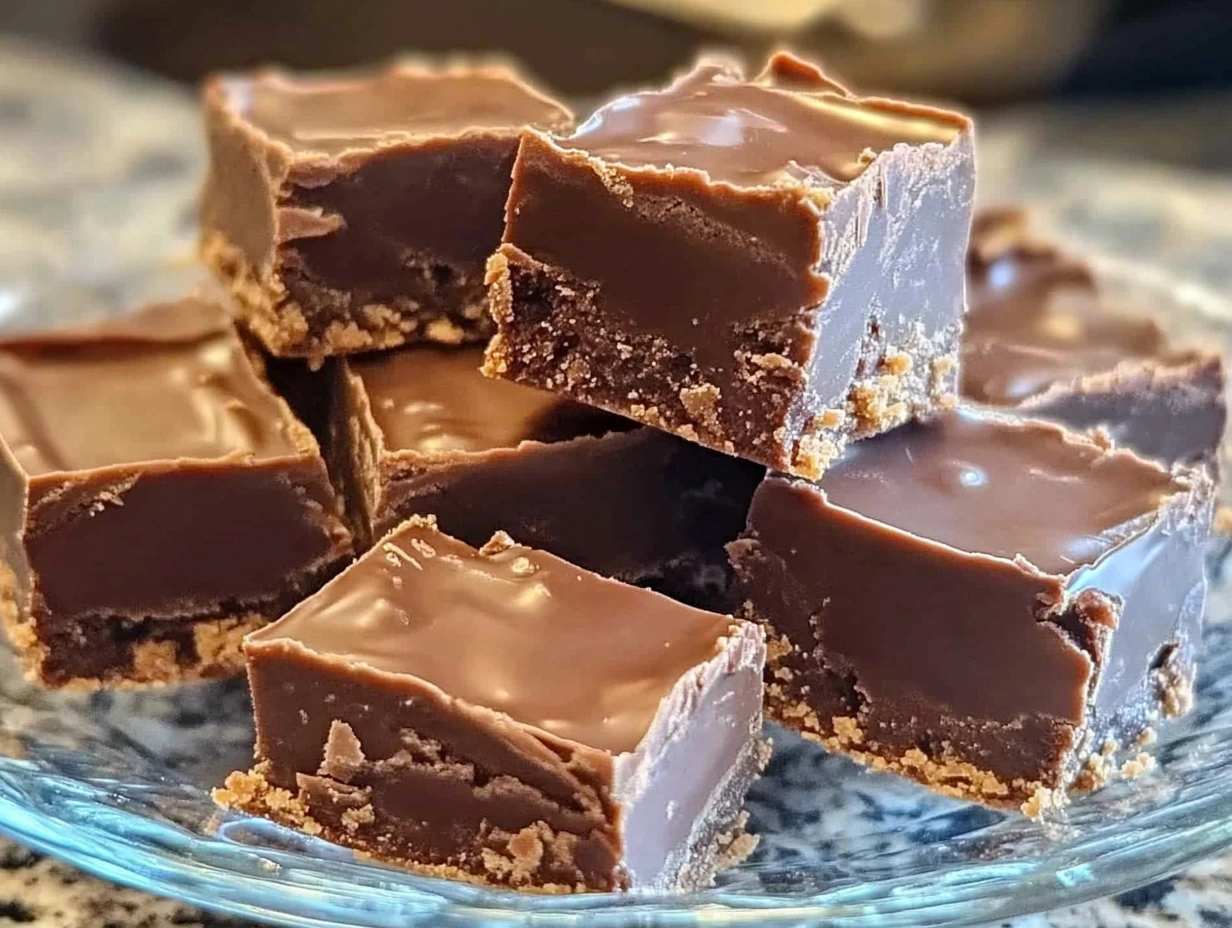
There’s something magical about making old-fashioned chocolate fudge at home. It’s rich, creamy, and satisfies that deep chocolate craving in the most comforting way. Whether it’s for a cozy night in, a holiday treat, or just because you feel like indulging, this recipe hits all the right notes. Plus, it’s surprisingly simple, even if you’re not a seasoned candy maker. Let’s dive into the first steps to creating this nostalgic masterpiece!
The Allure of Homemade Fudge
Fudge brings back so many memories for me—especially around the holidays. I remember sneaking pieces from the cooling tray as a kid, marveling at how something so rich and smooth could come from such simple ingredients. Making fudge feels a bit like alchemy: you start with basic pantry staples, add a bit of heat and patience, and end up with a decadent treat that everyone loves.
What sets this old-fashioned recipe apart is its authentic approach. There’s no shortcutting with marshmallows or condensed milk here—just classic ingredients, a bit of technique, and the promise of perfection.
Ingredients for Perfection
Here’s what you’ll need to make the most velvety chocolate fudge:
- 1 cup Whole Milk
The base for creating that creamy texture. - 2 cups Granulated White Sugar
For sweetness and structure. - ½ cup Unsweetened Cocoa Powder
Brings the deep, rich chocolate flavor we crave. - 4 tablespoons Unsalted Butter (softened and sliced)
Adds smoothness and a hint of richness. - 1 teaspoon Vanilla Extract
Enhances the chocolate flavor with a sweet, aromatic touch.
Preparing for Success
Before we get started, a little prep work can make all the difference. Grease an 8-inch square baking dish generously so your fudge doesn’t stick, and gather all your ingredients. Trust me, once the process starts, you’ll appreciate not having to scramble for anything!
Let’s Make Fudge: The First Steps
1. Blend the Dry Ingredients
In a medium saucepan, whisk together the granulated sugar and cocoa powder. This step is key to ensuring there are no lumps later on. Take your time and mix until it’s perfectly combined.
2. Add the Milk
Slowly pour in the milk, stirring as you go. Keep mixing until the mixture is smooth and silky. This is the foundation of your fudge, so make sure everything is thoroughly incorporated.
3. Heat Things Up
Place the saucepan on medium-high heat. Stir constantly as the mixture starts to warm. Soon, you’ll see it transform from a grainy paste to a glossy liquid. This is when the magic begins! When the mixture starts to boil, you’ll notice the chocolatey aroma filling your kitchen—it’s heavenly.
A Quick Tip for Consistency
If you’ve ever felt intimidated by candy thermometers, don’t be! This recipe is perfect for beginners because it offers an alternative: the soft-ball test. But more on that later. For now, focus on stirring and keeping an even heat.
Simmering and Monitoring Temperature
4. Reduce to a Simmer
Once the mixture begins to boil, it’s time to lower the heat to a gentle simmer. At this point, resist the urge to stir! Let the mixture work its magic undisturbed. Stirring too much can lead to grainy fudge, and nobody wants that.
5. Monitor the Temperature
Attach your candy thermometer to the side of the saucepan. Your goal is to reach 238°F (114°C), also known as the “soft-ball stage.” This is where the fudge’s texture is determined. It typically takes about 10 minutes to reach this point, so stay attentive.
Alternative to the Candy Thermometer
No candy thermometer? No problem! Use the old-fashioned soft-ball test. Simply drop a small amount of the hot mixture into a bowl of cold water. If it forms a soft, pliable ball that flattens when pressed between your fingers, you’ve nailed it. It’s a fun and nostalgic method that works just as well.
Cooling the Fudge Mixture
6. Cool Down
Once you’ve hit the perfect temperature, remove the saucepan from the heat and let it cool—undisturbed—to about 110°F (43°C). This cooling step is crucial for achieving the right consistency. It will take about 50 to 70 minutes, so grab a book or relax while the fudge does its thing.
A Helpful Tip: Don’t Stir While Cooling
It’s tempting to give the mixture a stir during this phase, but trust me, leave it alone! Stirring before it’s properly cooled can cause the sugar crystals to form too early, resulting in a gritty texture.
Beating to Perfection
7. Add Butter and Vanilla
Once the fudge has cooled, it’s time to bring it all together. Add the softened butter and vanilla extract to the mixture. These final ingredients are what give the fudge its creamy richness and depth of flavor.
8. Beat the Mixture
Now comes the workout! Using a wooden spoon, beat the mixture vigorously. You’ll notice the glossiness start to fade, and the fudge will thicken as you stir. Keep going until the mixture holds its shape and has a creamy consistency. This step might take a little elbow grease, but it’s worth it for the smooth texture you’ll achieve.
Transfer and Shape the Fudge
9. Pour into the Pan
Working quickly, transfer the fudge into your prepared, greased 8-inch square pan. Spread it evenly using the back of a spoon or an offset spatula. Smooth the surface with gentle pressure.
10. Set and Cool
Let the fudge sit at room temperature or in the refrigerator until it’s completely firm. This is the final stretch! Once set, you’re ready to cut your creation into bite-sized squares.
Helpful Tips for Picture-Perfect Fudge
- Use a Sharp Knife: To get clean edges, warm your knife under hot water, dry it, and then slice.
- Don’t Rush: Allow the fudge to fully set before cutting to avoid crumbling.
- Store Smart: Keep your fudge in an airtight container to maintain freshness. It’ll stay delicious for up to a week at room temperature—or longer in the fridge!

Wrapping Up Your Fudge Adventure
Congratulations! You’ve made it to the final stretch of creating the most delicious old-fashioned chocolate fudge. By now, your home is filled with the enticing aroma of rich cocoa, and you’ve got a pan of decadent fudge ready to be enjoyed. Before we finish, let’s tackle some common questions and explore creative ways to elevate your fudge game.
FAQs About Old-Fashioned Chocolate Fudge
1. Why is my fudge grainy?
Grainy fudge often results from sugar crystals forming too early in the process. To prevent this, avoid stirring the mixture once it begins simmering. Additionally, ensure your sugar and cocoa are fully dissolved before heating.
2. Can I make fudge without a candy thermometer?
Absolutely! The soft-ball test is a reliable old-school method. Drop a small amount of hot fudge into cold water. If it forms a soft ball that flattens slightly when removed, your fudge is ready.
3. How do I store fudge?
Store your fudge in an airtight container at room temperature for up to a week. For longer storage, refrigerate it for up to two weeks or freeze it for up to three months. Make sure to separate layers with parchment paper to prevent sticking.
4. Can I add nuts or other mix-ins?
Yes! Chopped walnuts, pecans, or even dried fruit make great additions. Stir them in just before transferring the fudge to the pan.
5. What should I do if my fudge doesn’t set?
If your fudge remains soft, you can try re-heating it with a bit more milk and bringing it back to the correct temperature. This is a common fix for undercooked fudge.
6. Can I double the recipe?
Yes, but be cautious. Doubling fudge recipes can be tricky because larger quantities may cook unevenly. If you’re feeding a crowd, consider making two separate batches instead.
7. Can I make this fudge dairy-free?
You can substitute non-dairy milk (like almond or oat milk) and plant-based butter for a dairy-free version. Keep in mind that this may slightly alter the texture and flavor.
Creative Twists on Classic Fudge
If you’re feeling adventurous, here are some fun variations to try:
- Peppermint Fudge: Add ½ teaspoon of peppermint extract and sprinkle crushed candy canes on top.
- Salted Caramel Fudge: Swirl caramel sauce into the fudge before it sets and sprinkle with flaky sea salt.
- Espresso Fudge: Stir in 1 teaspoon of instant espresso powder for a mocha twist.
- Rocky Road Fudge: Mix in mini marshmallows and chopped almonds for a classic treat.
Conclusion: Share the Love
There’s something incredibly satisfying about creating a timeless treat like old-fashioned chocolate fudge from scratch. It’s more than just candy—it’s a gift, a memory, and a small piece of joy you can share with others. Whether you’re making it for a special occasion or simply to indulge your sweet tooth, this recipe is sure to delight.
Now that you’ve mastered the art of fudge-making, why not spread the love? Pack up a batch for a friend, bring it to your next gathering, or simply savor it with a cup of coffee and a good book. Don’t forget to share your results and any creative variations you try—I’d love to hear how it turned out for you!
Here’s to rich, creamy, chocolatey perfection. Enjoy every bite!
Print
Old-Fashioned Chocolate Fudge
- Total Time: 50–70 mins
Description
This classic chocolate fudge is rich, smooth, and delightfully indulgent. Perfect for holidays, gifting, or satisfying a chocolate craving, this homemade treat is as nostalgic as it is delicious. The process may take a bit of patience, but the melt-in-your-mouth result is well worth the effort!
Ingredients
- 1 cup Whole Milk
- 2 cups Granulated White Sugar
- ½ cup Unsweetened Cocoa Powder
- 4 tablespoons Unsalted Butter, softened and sliced
- 1 teaspoon Vanilla Extract
Instructions
1️⃣ Gather ingredients: Assemble all your ingredients before starting to ensure a smooth cooking process.
2️⃣ Prepare the pan: Grease an 8-inch square baking dish generously to prevent sticking. Set aside.
3️⃣ Mix dry ingredients: In a medium saucepan, combine the granulated sugar and unsweetened cocoa powder. Stir until well blended.
4️⃣ Add milk: Pour in the whole milk and stir thoroughly until the mixture is smooth and uniform.
5️⃣ Heat the mixture: Place the saucepan over medium-high heat, stirring constantly until it begins to boil.
6️⃣ Simmer and monitor temperature: Reduce the heat to a gentle simmer. Attach a candy thermometer to the saucepan and let the mixture cook undisturbed until it reaches 238°F (114°C), approximately 10 minutes.
Alternative method: If you don’t have a candy thermometer, use the soft ball test. Drop a small amount of fudge into cold water; if it forms a soft ball that flattens when removed, it’s ready.
7️⃣ Cool down: Remove the saucepan from the heat and let the mixture cool to 110°F (43°C). This will take 50–70 minutes. Avoid stirring during this cooling phase.
8️⃣ Add butter and vanilla: Once cooled, add the softened butter and vanilla extract. Beat vigorously with a wooden spoon until the mixture thickens, becomes less glossy, and starts to hold its shape.
9️⃣ Transfer to pan: Pour the fudge mixture into the greased pan. Spread it evenly, gently pressing to smooth the surface.
🔟 Set and cut: Allow the fudge to cool completely at room temperature or in the fridge. Once firm, cut it into 1-inch squares.
Notes
- For extra flavor, stir in chopped nuts or a sprinkle of sea salt before transferring to the pan.
- Store fudge in an airtight container at room temperature for up to a week or in the fridge for longer freshness.
- Prep Time: 15 mins
- Cook Time: 20 mins
